Showing posts with label weddings. Show all posts

Wednesday, May 22, 2013

The Bride's Headpiece--a check off the list!


Okay, this has actually been done for quite sometime now, but I've been quite busy with work and passion projects--plus my craft ADHD has me skipping hopping and crocheting myself into a coma these days.

So, for posterity and documentation, I have finished the satin flower headpieces for my sister's wedding.  Actually, I'd just call it a headpiece--made out of two flower units. I figured it'd be easier to have them in two, for easier positioning.


These flowers are cut and singed satin, the technique I will be teaching this weekend at another bridal workshop at Craft MNL!  :-)

I sewed in big natural pearls for the centers.  Whee!  Another check off the list (that keeps growing because of my excitement and craft-hop-skippiness)!

Tuesday, April 9, 2013

In my quest not to cram...

Tadah! An arrhae pillow.
I've been ticking off my list the different handmade items I'm preparing for my sister's wedding this July.  So far, we're done with the Save-the-dates and the couple's seal (will post photos of those soon).  We also did a quick course on fabric flowers while Clarisse was in town.

Fabric flowers for her entourage!  Clarisse learning how to make fabric flowers.

I mean to finish her headpiece, then their signing tree, then focus on their invitations.  Sounds like a plan, huh?  Just sharing in photos the process of making my sister's arrhae pillow.  I made an earlier one to serve as her ring pillow.  Another check off the list, and a handmade item closer to a heart-made wedding.

It starts off with crocheting a little doily, which I made in the company of yesterday's amigurumi class.
Materials assembled!  Items include satin ribbon, linen cloth and organic cotton.
Sewed the linen to make a pillow with my trusty Brother.
Once sewn, I stuffed the pillow with the organic cotton I've had in stock from Ritual.
After closing up the pillow, I sewed the doily onto it, keeping the stitches inside and away from view.
Will keep posting the items I finish!

Monday, April 1, 2013

Scribbling again


My latest signage/calligraphy project.  Gouache on primed canvas.
Happy Easter!  :-)  I've been dying to resume my writing here, and in the middle of deadlines and tasks, I'm stealing a few moments to do this update.  I figure this is the kind of thing you just have to go ahead and do, as between projects, my family and loved ones, wedding preparations (for my wedding and for my sister's), travel, and life in general, you just really have to stick your leg out, or literally jump off the train for a few moments to get what you want to do, done.

Anyhow, I've returned to nurturing my romance with letters.

Text from the Mole and the Owl.  Recent calligraphy practice.
In high school, I developed an interest in calligraphy from one of my teachers who was formerly a Pink Sister (a cloistered religious order).  She would write me these notes in a lovely gothic type, and I asked her to teach me.  We never really got around to having formal writing sessions, but I studied her pens and the way she wrote, and got myself some pens of my own.

I always wondered though about the elegant script type of calligraphy, the delicate cadence of wide and narrow strokes.  I thought they could be achieved by varying the way I held my gothic nibs.  So when I joined Fozzy's calligraphy workshop at CraftMNL last year, my eyes widened (the heavens opened and the lights danced before my eyes to a crescendo of angelic voices) at seeing how flexible nibs worked.

Amazeballs.  Photo from CraftMNL's Instagram.
And since then, I've been hooked!  Nowadays though I find myself doing gouache or watercolor type and signages for a number of different occasions.

For my sister's wedding.

Directional signage for one of our events.  Watercolor paper mounted on an embroidery hoop.
Will be posting more projects soon, but for now, a shoutout to the world that my romance with scribbling and type has been rekindled.

Monday, September 17, 2012

Jay ♥ Czacza: The Actual Setup

Vintage imagery + Typography + Heat transfer = His print
And as plans went, the winds leaned towards the tempestuous, especially when it applied to the reception preparations.  The fluctuations on the number of guests, tables, table configurations, etc. increased in the days leading to the big event, but Czacza was the picture of ease and grace.  Even as she dropped by the night before to see the centerpiece porcelain items and drop off the printouts of the wedding rules, she was composed (as she matter-of-factly told her groom that she couldn't deal with his shoe selection issues at the moment) despite relaying all of the last-minute concerns.

The Hers print.  :-)
I still don't have all of the photos of all of the handmade details (the "Just Married" heat transfer buntings, the fresh flower bouquets of the entourage), but let me share some items we were able document.

The boutonnieres looked like this!
The boutonnieres were made from canvas, hemp rope, dried misty blue flowers and pearl.  I had fun experimenting with the ombre effect.

Bouquet and a detail of the backdrop.
Instead of sticking to just blue, the entourage bouquets incorporated pink, so we added those hues to the centerpieces as well, with hydrangeas, berries and astrumeria.  The hydrangeas were more whitish than bluish, and since these aren't that easy to get (we had to reserve these about a month in advance), we had to make do.  The original plan for pink roses for the entourage had to be changed to pink and cream carnations and mums with berries (gosh, I have to get photos of those).

Detail and top view of the varied centerpieces.
We had varied centerpieces, incorporating the bottles with the decals, porcelain tea cups and bowls with floating candles, using vases and varied sizes of mason jars to hold the flowers, votives, and decorative ceramic balls.

Using embroidery hoops with heat transferred designs in the backdrop.
For the backdrop, we had a frame constructed, and incorporated printed designs hanging from embroidery hoops of various sizes, as well as doilies, lace, ribbon and string.

Embroidery hoops and doilies!
The beads from the original setup for the centerpieces were strung from the backdrop instead.

The floating candle waits to jump into the teacup.
We did the table numbers in embroidery hoops too.
Doilies and ribbon for the seats.
Enderun was a pretty venue.
All in all, we were pretty happy with how it turned out, and were glad to have been part of Jay and Czacza's special day.  And for a first handmade styling gig, we sure learned a lot.  This was a team effort, with Mom and Dad pitching in (making me go to bed at 5 AM), Lex being a sport in the sourcing of items, and Gemma and Nikki helping during the setup itself.

Here's to handmade details! 

PS: The awesome wedding coordinators were Jets and Rhona Battung of Canaan Celebrations.

Sunday, August 26, 2012

First Styling Gig! Jay ♥ Czacza

So a while back, I posted on silkscreening doilies for a friend's wedding.  It was also for this same gig that I prepared this sample rustic bouquet of fabric roses.  Since the fabric bouquet seemed too minimalist for her, I tried my hand at arranging a fresh one.  And since the wedding happily took place last July, I can now post pictures of how everything turned out!  :-)

First off, the sample setup.  The bride specifically requested for hydrangeas, and thankfully Lex and I were able to source these.  I learned though that fresh flowers are really tricky.  Their availability depends on the weather, the farm's disposition, transportation, etc.  For the setup, I was able to get hydrangeas that had bluish/purplish flowers.

Hydrangeas are lovely, aren't they?  They're also very thirsty flowers.  I learned though that they can last for quite a long time even when cut, as long as they're in water.
Then I tried to think of how to add a touch of charm.  And the first thing I thought of were doilies!  So I got to work having a screen made, and made a few for the setup.  They ended up in varying shades of gray, so I had to note that when I went into producing all of the doilies needed for the reception, I'd need a big batch of a pre-mixed gray.

I also thought of using stickered bottles for the centerpieces.  The decals used had nice romantic words and graphics.  I hadn't quite seen these at a setup before (then again, I don't look around that much), but then I just liked the idea.  The bride agreed.  :-)

I used jute string to hang a sparse curtain of blue beads (for the blue element of her wedding motif), and put in these decorative ceramic balls.  The bride actually suggested these in her pegs.  I love the way candles can totally change how a simple setup looks, so I learned how to make floating candles, and got some ceramics and glassware.

The sample rustic bouquet, and the setup from top view.  The bride vetoed the dried tree-stuff on the table.
I also got some succulents, put them in odd, charming porcelain and added them to the table decor.

Setup details!
And voila!  I was pretty happy with how it turned out.  Little did I know what a challenge it would be, replicating this to a reception setting of more than 120 (the guest list grew--these things apparently happen in the process).

My next post will be how the actual wedding setup turned out.  :-)

Sunday, May 20, 2012

And away they go.

Hmmm.  My first sale on Etsy.
And off they go.

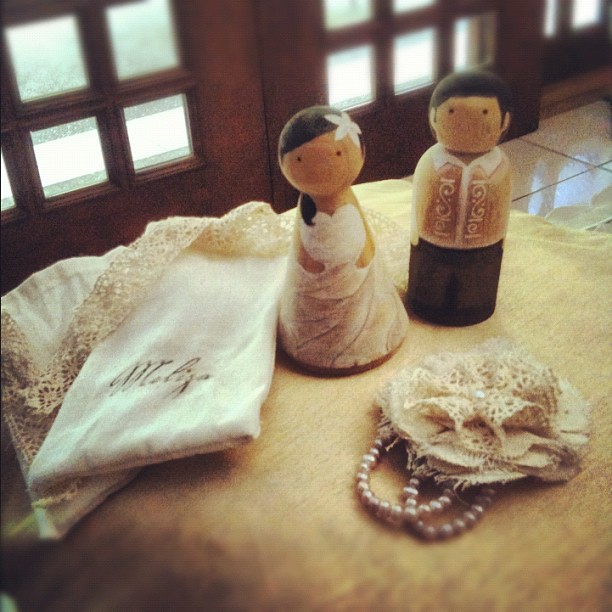
My first set of handpainted cake toppers go to a lovely Filipino couple in New Jersey.  Just to make it extra-special, I sewed two pouches (loving my sewing machine!) for these two to be kept in.  And because it took me a while to put everything together, I'm slipping into the package this lovely brooch/bracelet made of canvas, cotton lace and pearl.

I'm a fan of multi-functional jewelry.

I first prototyped this type of brooch/bracelet when I was designing something with my older sister in mind.  She's allergic to metals (though she seems to be okay with gold--quite the high-end allergy, if you don't consider fabric, wood and other non-metal alternatives)--her skin gets all red and blistery when in contact with them.  So to minimize metal contact, I prepared a bracelet with a strap made of wooden beads, topped with a canvas flower, that when detached from the strap can be used as a brooch.  There's still a bit of metal contact (the brooch clasp), but at least it isn't all that much.

So for Meliza, who ordered the cake toppers off of my Etsy shop, I made the bracelet/brooch above.  My first prototype of this kind had a smaller flower, but a friend suggested having a bigger one, creating more of a statement piece.

Personalized pouches.  Love.


And here are the heat transfer-printed pouch bags I made with my trusty sewing machine!

And off they go tomorrow on yet another adventure.  Awww.  I got kind of attached to this cake topper couple.  Sniff.  They'll be lovely additions though to someone's wedding memories, which I think is a beautiful thing.

Thursday, April 19, 2012

A Fresh Flower Arrangement!

Fresh and pretty...a day after getting the flowers!

Yay, so I was finally able to finish the fresh flower bouquet sample for a friend's wedding.  Her theme is more on the blues, but for lack of blue-hued flowers, I went with purples and whites and greens.

I learned something from Lex on why there's a scarcity of blue flowers.  Apparently, bees can't see the color blue all that well, so blue flowers aren't pollinated as much, and thus they aren't as prolific.

Anyway, the bouquet above is assembled from purple and white paper roses, the delicate misty blue (I heard they dry to the same color, so I'll tie a bunch together and hang), and some berries.

Flipping through a bouquet book at National Bookstore, I learned that this type of bouquet is the "natural" type, a less calculated arrangement as opposed to the more "finished" types of bouquets.

Glad they were happy with this.  :-)

Wednesday, April 11, 2012

Hello, blue roses!

Because I've been especially busy (since the long weekend ended), I'd just like to share some photos of a blue rose bouquet I made as a sample for a friend's wedding.  Though she chose to go with fresh instead (so now I'm learning all about fresh flowers), I'm still pretty happy with this rustic, minimal bouquet.

Close-up of the large flower.
I used two shades of blue of geena silk, and mixed it in with a mid-tone satin.  And to add to the rustic feel, I put in some canvas petals.  I love the way the addition of a neutral tone makes something more elegant, don't you?  :-)  I used this DIY project from Greenweddingshoes (love that site!) as a reference for constructing the flower.  I then wrapped the wire stems first with floral tape, then hemp rope for more of the rustic feel.  The whole bouquet is finished off with the addition of dried flowers, tied together with the roses using cream cotton lace.

It was an overcast day when I photographed these in the yard.  No adjustments to the image.
I'll document the process next time to share.  :-)

Saturday, March 31, 2012

How doilies are made: silkscreen

A shot from the setup.  See how the gray doilies underneath came to be below.

Yes, yes, we all know doilies are most commonly produced through crochet.  But for this particular styling setup (it's a bridal one), I figured to mass-produce them the silkscreened way.  :-)

First, I settled on a generic doily design, and tweaked it a bit.  I then went over to the good folks at Hocus Manila to have the design worked out on a screen.  Andrei and Sheina of Hocus are awesome--they put together custom bikes (you can also get spare bike parts), as well as produce silkscreens and serigraphs.  Lex and I are working with them in rolling out workshops, as well as bike-related merchandise.  Well, that's another story I'll share sometime else.

Just to give you an idea of why I decided to silkscreen the doilies--I met up with the bride-to-be at her reception venue, and she lamented the state the chairs were in--they were brown, and some were a bit worn.  They were the bulkier, padded chairs.  I then offered to drape the chairbacks with a bit of design (with a bit of a beaded tassel on the end), and in order to maximize this particular design, I figured to produce a modular, multipurpose piece, to use as a table-runner as well.

Well, hopping back into the process, I then proceeded to prepare the cloth to be silkscreened.  I went with katcha--a type of cheesecloth that's light and fine, but a mesh that is loose enough to be viewed as having a rustic appeal.

Putting my trusty sewing machine to work, I hemmed the edges.  The doily design is about 18 inches across, so I put in a small allowance for that.


So when those were done, I prepared the silkscreen area.  Taking the screen, I attached it to a swinging table (fashioned after the one Andrei and Sheina have) with C-clamps, and poked around the textile paint I was so generously given.

I had to mix the lighter shade of gray I wanted, which took a bit of time.  The paint was a bit thick too, and I didn't have the thinner prescribed.  But the setup was a few days away at the time, and I had to make do with what I had.


I lined the table with newspaper (which I had to struggle with later on, as the screened fabric stuck to it), took my mixed light gray, and went to work.  After priming the screen, I made a test one on paper.  When it seemed safe to proceed, I tried one, which had some inconsistencies.  The others had their bits of inconsistency as well, and I guess I'll have to find the textile paint thinner for when I mass produce these (for about 120 seats and 12 tables).  To spread the paint, I used a huge squeegee Hocus lent me (I'll give it back soon, guys!).  And after each doily was printed, I'd lay it to dry on the outdoor bar counter at home (which Creamy the cat promptly stepped all over, leaving light cat prints on the counter top).


Midway the short print run though, I ran out of mixed gray!  I hastily mixed another batch (as the screen was drying already) which ended up darker then the first, but better executed.  Lesson learned.

The doily print was fun to make, and I'm really excited to do the rest (also so that I can return Hocus' squeegee already).  I just need a better place to dry the prints.

Will post more on the preps for the said setup later on.  Things have been busy and brewing!  Lex and I have been fixing up the Craft MNL workshop space.  We had a special guest yesterday, and a crafty confluence of events will produce something wonderful in May.  Stay tuned for that.

'Til the next handmade adventure.  :-)

Friday, March 16, 2012

To go with fresh? Or with flowers that last?

Okay, I'm no florist.  But I've been into making fabric bouquets and fabric flowers.  And I say--to each her own.  :-)  Through my current styling projects I'm slowly learning more about fresh flowers, and from all of the fresh bouquets I've seen so far, I think it can safely be said that no level of artisan talent can equal the diversity and delicate aesthetic of Mother Nature.

But as a crafter I also say--craft-y-ness + creativity = the happy products of the very human yearning to create as well as to make things last (woohoo, may I dramatize the case for fabric flowers...).  Memories and keepsakes are, I think, a reflection of how wonderfully human we all are.  How we would like to cling to things, to remember things--and to be remembered by what we pass on.  But I stray.  Back to flowers.

I started making fabric flowers for head pieces I was having fun with last year.

Ribbon rose with tinted freshwater pearls on my Alice headband.  Awesomely modeled by Zee.
Then upon further research, my fabric-flower know-how extended beyond ribbon roses, and I think I had too much fun with satin and geena silk and bouquet tutorials.


I got to put this new skill to use with my sister's wedding last year.

All bouquets (except for the bride's bouquet of fresh orchids) are handmade with love.
Close up of some of the entourage bouquets.  Photos above by Nelwin Uy.
And now that I'm taking baby steps into styling, the question between fresh or lasting presents itself even more often.  Fresh is an absolute classic.  But, the mounds of moolah you spend on them sometimes end up being cast away at the end of the celebration.  Which is mainly the reason why people consider craft bouquets (another reason is, I've realized that it's also easier to match dresses to the fabric colors used in DIY bouquets which may not be as available in Mother Nature's floral palette).  The lasting DIY craft bouquets, by virtue of being handmade can also be quite expensive though.  BUT, they can also be quite the budget option as well--IF well--you make them yourself.  :-) And it isn't as hard as you think.  I'm currently cooking up a way of sharing the DIY love with brides on a budget.  Stay tuned for that.  If you'd like to check out the tutorial I based the above bouquets on, hop on over to Elizabeth Anne Designs here.  I just used a different sort of fabric flower, but once you get the base (wire whisk) down, the possibilities for these topiary-style bouquets are as endless as you make them.

Here's a sneak peek at my most recent fabric bouquet flower, using a different base and flower type.

Canvas and geena silk with hemp rope and dried flowers.
Will post more on how this project goes.  Blue roses?  No problem.  Hooray for the inspiration we get from nature.  :-)  I think it's great that we get to celebrate the beauty of what's around us together with a twist of homegrown creativity.

Sunday, February 5, 2012

A Roadtrip, and a Beach Wedding...

Of sorts.


Yesterday was the opening of the 19th Season of the Pundaquit Festival!  Not wanting to miss this awesome happening of happy tunes and great vibes, Lex and I headed out with his folks to see the San Miguel shoreline of Zambales.


And of course, apart from Lex's parents, we brought a couple of friends along.


Enjoying the view en route to Zambales.

While waiting for the program to start, we hung out on the beach and had the two frolic along the shore.


 Dreaming along the shore.


Some folks in the distance took notice, but the couple didn't mind. 


All in all it was a fun afternoon, and a good prelude to the evening of music.


These figurines are actually little cake toppers I've been prototyping.  Wouldn't they be fun little keepsakes?

I wanted the grain to still show, to maximize the wood's natural finish.  The translucent application of paint allowed for delicate shading.  I used gouache, then finished them off with a fixative.

The bride's dress is inspired by my little sister's wedding gown, and of course the groom is wearing our traditional Barong Tagalog.

They'll soon be available on our Etsy shop!  For local buyers, just send me an email!  I'd love to customize a set, or single toppers for you.